- English
- Chinese
- French
- German
- Portuguese
- Spanish
- Russian
- Japanese
- Korean
- Arabic
- Irish
- Greek
- Turkish
- Italian
- Danish
- Romanian
- Indonesian
- Czech
- Afrikaans
- Swedish
- Polish
- Basque
- Catalan
- Esperanto
- Hindi
- Lao
- Albanian
- Amharic
- Armenian
- Azerbaijani
- Belarusian
- Bengali
- Bosnian
- Bulgarian
- Cebuano
- Chichewa
- Corsican
- Croatian
- Dutch
- Estonian
- Filipino
- Finnish
- Frisian
- Galician
- Georgian
- Gujarati
- Haitian
- Hausa
- Hawaiian
- Hebrew
- Hmong
- Hungarian
- Icelandic
- Igbo
- Javanese
- Kannada
- Kazakh
- Khmer
- Kurdish
- Kyrgyz
- Latin
- Latvian
- Lithuanian
- Luxembou..
- Macedonian
- Malagasy
- Malay
- Malayalam
- Maltese
- Maori
- Marathi
- Mongolian
- Burmese
- Nepali
- Norwegian
- Pashto
- Persian
- Punjabi
- Serbian
- Sesotho
- Sinhala
- Slovak
- Slovenian
- Somali
- Scots Gaelic
- Shona
- Sindhi
- Sundanese
- Swahili
- Tajik
- Tamil
- Telugu
- Thai
- Ukrainian
- Urdu
- Uzbek
- Vietnamese
- Welsh
- Xhosa
- Yiddish
- Yoruba
- Zulu
- Kinyarwanda
- Tatar
- Oriya
- Turkmen
- Uyghur


Home Depot Expansion Bolts Guide: Types, Sizes & Expert Tips
2026-06-14
- What Are Expansion Bolts and How Do They Work?
- Primary Types of Expansion Bolts Available
- Comprehensive Size Guide and Selection Chart
- Step-by-Step Installation Guide
- Material Considerations and Corrosion Resistance
- Load Capacity and Safety Factors
- Troubleshooting mataupu masani
- Frequently Asked Questions (FAQ)
- Expert Tips for Maximizing Performance
- Industry Perspective: Manufacturing Excellence
- Conclusion and Final Recommendations
Looking for reliable Fale o le fale for your next construction or DIY project? This comprehensive guide details the specific types, precise sizing charts, and expert installation techniques available exclusively through The Home Depot. Whether you are securing heavy machinery to concrete or mounting shelves in masonry, understanding the correct anchor selection is critical for structural integrity. We break down the mechanics of wedge anchors, sleeve anchors, and drop-in anchors found in their inventory, ensuring you choose the right fastener for your load requirements and base material without the guesswork.
What Are Expansion Bolts and How Do They Work?
Expansion bolts are mechanical fasteners designed to secure objects to solid base materials like concrete, brick, or block. The fundamental principle relies on mechanical expansion. When the bolt is tightened, a component within the anchor expands outward against the walls of the pre-drilled hole. This creates significant friction and interlock, transferring the load from the fixture to the base material.
The effectiveness of these fasteners depends entirely on the quality of the base material and the precision of the installation. Unlike chemical adhesives, mechanical expansion bolts provide immediate load-bearing capacity once torqued. At The Home Depot, the selection focuses on high-grade steel and zinc-plated options suitable for both indoor and outdoor environments. Understanding the physics behind the expansion mechanism helps users avoid common failures such as pull-out or shear failure.
There are three primary forces these bolts resist: tension (pulling out), shear (sliding across), and combined loads. The design of the expansion clip or sleeve determines how well the bolt handles these forces. For instance, wedge anchors excel in pure tension applications, while sleeve anchors offer versatility in varying hole tolerances. Selecting the right type from the available Fale o le fale inventory ensures your project meets safety standards.
The Mechanics of Friction and Interlock
When an expansion bolt is installed, the nut is tightened, pulling the stud upward relative to the expansion cone or clip. This action forces the metal segments to press firmly against the concrete. The resulting hoop stress in the concrete must not exceed its tensile strength, which is why edge distance and spacing are vital. If the bolt is too close to the edge, the concrete may crack and spall, compromising the hold.
The surface finish of the bolt also plays a role in corrosion resistance and friction coefficients. Galvanized options provided by major retailers offer a balance between cost and durability for general construction. For harsher environments, stainless steel variants are often recommended, though availability varies by location. The interaction between the steel and the masonry is what ultimately holds the weight.
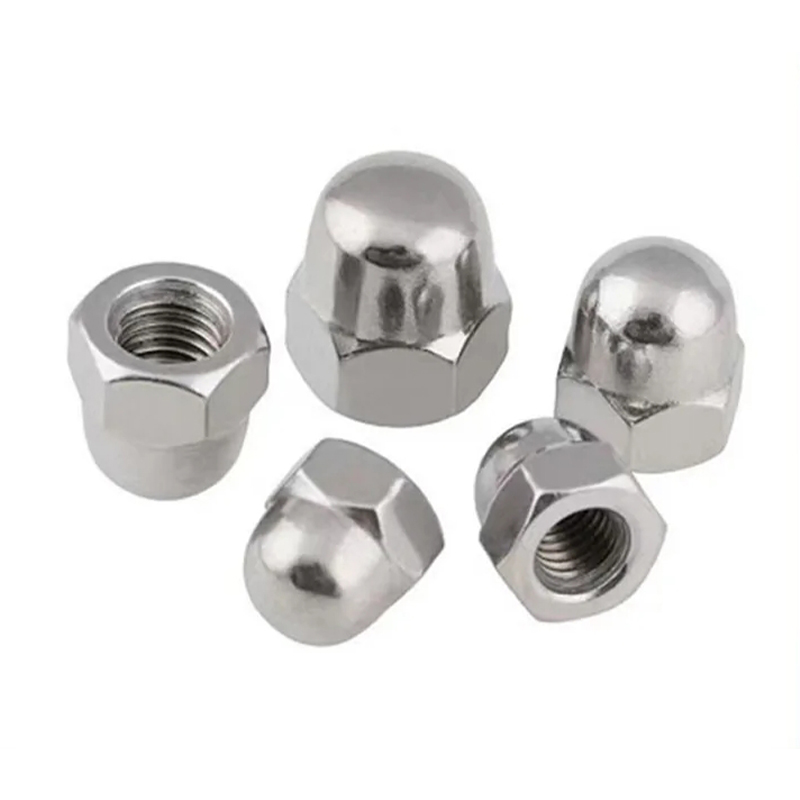
Primary Types of Expansion Bolts Available
The Home Depot carries several distinct categories of expansion anchors, each engineered for specific applications. Choosing the wrong type can lead to installation failure or damage to the base material. The main types include wedge anchors, sleeve anchors, drop-in anchors, and hammer sets. Each has unique installation requirements and load characteristics.
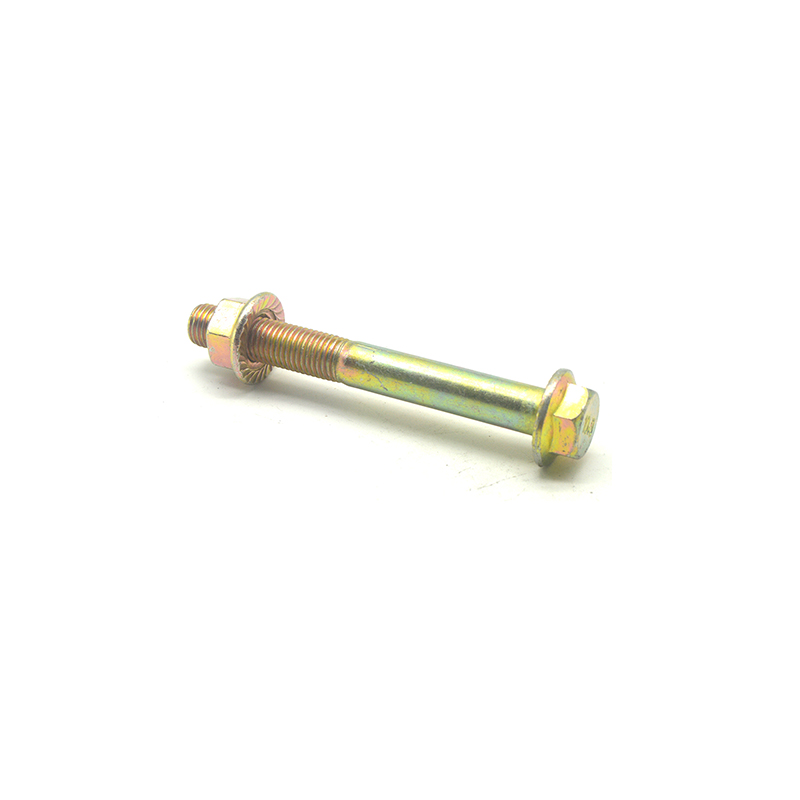
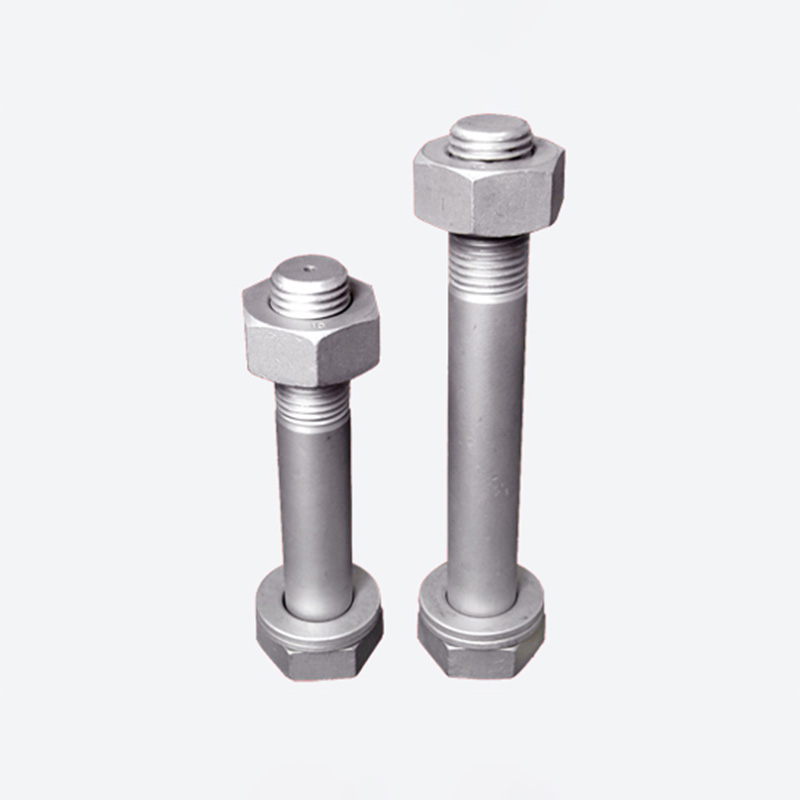
Wedge anchors are arguably the most popular choice for heavy-duty applications in solid concrete. They feature a small expander wedge at the bottom of the shaft. As the nut is tightened, the wedge is pulled up into the sleeve, expanding it uniformly. These are ideal for structural steel columns, pipe supports, and heavy machinery where maximum holding power is required.
Sleeve anchors offer greater versatility, working effectively in concrete, block, and brick. The entire body of the anchor expands when tightened. This makes them more forgiving of slightly oversized holes compared to wedge anchors. They are commonly used for mounting handrails, light fixtures, and electrical boxes where the base material might vary in density.
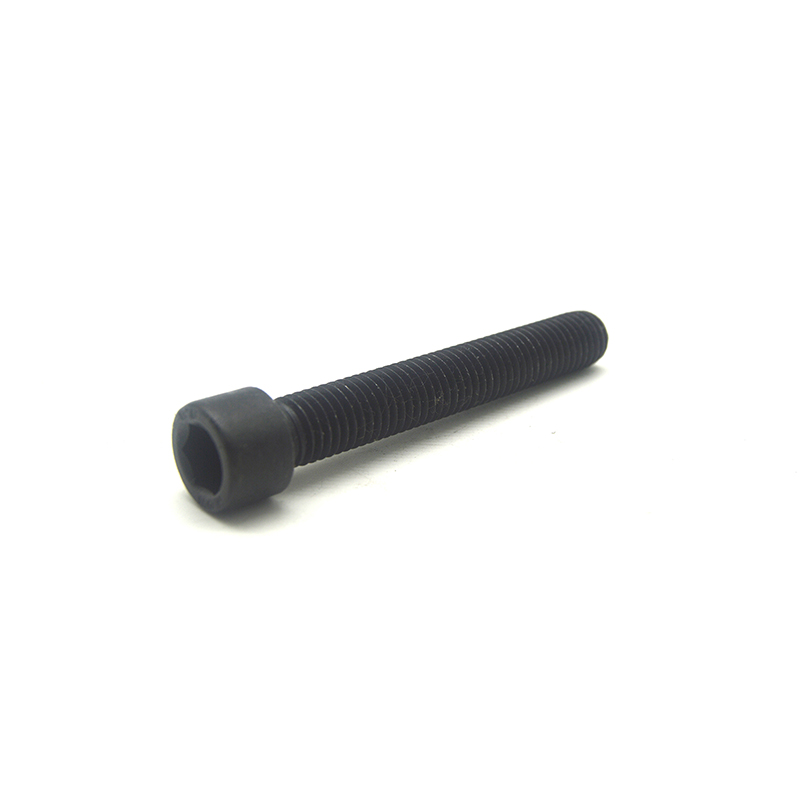
Drop-In Anchors and Hammer Sets
Drop-in anchors are designed for flush-mount applications where a protruding bolt head is undesirable. These are installed by dropping the anchor into the hole and setting it with a specialized setting tool. Once set, a threaded rod or bolt is screwed into the internal threads. They are frequently used in overhead applications like hanging signs or sprinkler systems.
Hammer sets, often referred to as hammer drives, are simpler fasteners typically used for lighter loads. They consist of a pin driven into a metal shell. While less robust than wedge or sleeve anchors, they provide quick installation for attaching furring strips or light gauge metal tracks to masonry. Their speed of installation makes them favorable for high-volume, low-load tasks.
Understanding the distinction between these types is crucial when browsing the aisles or online catalog. A wedge anchor cannot be used in hollow block, and a drop-in anchor requires a specific setting tool that may not be in every homeowner’s toolkit. Matching the anchor type to the specific job requirement prevents costly rework.
Comprehensive Size Guide and Selection Chart
Selecting the correct size involves more than just matching the bolt diameter to the hole. You must consider the embedment depth, minimum base material thickness, and the required load capacity. The following table outlines the standard specifications commonly found among Fale o le fale. Always verify specific product packaging for exact tolerances, as manufacturing variations can occur.
| Bolt Diameter | Drill Bit Size | Min. Embedment Depth | Min. Base Material Thickness | Typical Application |
|---|---|---|---|---|
| 1/4 inch | 1/4 inch | 1 inch | 2-3/4 inches | Light shelving, electrical boxes |
| 3/8 inch | 3/8 inch | 1-5/8 inches | 3-1/2 inches | Handrails, medium machinery |
| 1/2 inisi | 1/2 inisi | 2-1/4 inches | 4 inches | Structural beams, heavy equipment |
| 5/8 inch | 5/8 inch | 2-3/4 inches | 4-3/4 inches | Bridge components, seismic bracing |
| 3/4 inch | 3/4 inch | 3-1/4 inches | 5-1/2 inches | Industrial foundations, column bases |
Note that the drill bit size generally matches the nominal diameter of the anchor for carbide-tipped bits. Using a masonry bit that is worn or incorrect can result in an oversized hole, rendering the expansion mechanism ineffective. The minimum embedment depth is critical; failing to drill deep enough prevents the anchor from expanding fully, drastically reducing its holding power.
Le minimum base material thickness ensures there is enough concrete behind the anchor to resist the bursting force of expansion. If the concrete slab is thinner than this recommendation, the bottom may blow out during installation. In such cases, alternative fastening methods like through-bolts or epoxy anchors should be considered instead of standard expansion bolts.
Understanding Thread Pitch and Length Options
Beyond diameter, the length of the bolt and the thread pitch are vital selection criteria. Expansion bolts come in various lengths to accommodate different fixture thicknesses. The rule of thumb is to add the thickness of the material being fastened to the minimum embedment depth. This sum gives you the minimum total length required for the anchor.
For example, if you are attaching a 1-inch thick steel plate using a 1/2-inch wedge anchor with a 2-1/4 inch embedment, you need an anchor at least 3-1/4 inches long. Buying an anchor that is too short will result in insufficient engagement. Conversely, an excessively long anchor may bottom out in the hole before expanding, or interfere with rebar within the concrete.
Thread pitch usually follows standard UNC (Unified National Coarse) specifications for imperial sizes. This ensures compatibility with standard nuts and washers available at any hardware store. When replacing existing hardware, matching the thread pitch is essential to ensure the nut tightens smoothly without cross-threading.
Step-by-Step Installation Guide
Proper installation is the single most important factor in the performance of expansion bolts. Even the highest quality anchor will fail if installed incorrectly. Follow this detailed procedure to ensure a secure and lasting connection when using products sourced from The Home Depot.
- Step 1: Mark and Verify Location. Clearly mark the drilling points on the base material. Use a center punch to create a small indentation; this prevents the drill bit from wandering when you start drilling. Double-check measurements to ensure alignment with your fixture.
- Step 2: Select the Correct Drill Bit. Choose a carbide-tipped masonry bit that matches the specified diameter for your anchor. Ensure the bit is sharp; dull bits create oversized, irregular holes that compromise holding power. Attach the bit securely to a hammer drill.
- Step 3: Drill the Hole. Drill perpendicular to the surface to the required depth. Use a piece of tape on the drill bit as a depth gauge to ensure you do not under-drill. The hole must be deeper than the anchor’s embedment length to allow for dust accumulation.
- Step 4: Clean the Hole Thoroughly. This is the most skipped yet critical step. Use compressed air, a wire brush, or a vacuum to remove all concrete dust and debris. Dust acts as a lubricant, preventing proper friction and expansion. A dirty hole can reduce holding capacity by up to 50%.
- Step 5: Insert the Anchor. Place the expansion bolt into the clean hole. For drop-in anchors, ensure they sit flush with the surface. For wedge and sleeve anchors, tap them gently with a hammer until the washer sits firmly against the fixture or the surface.
- Step 6: Tighten the Nut. Using a calibrated torque wrench, tighten the nut to the manufacturer’s recommended torque value. Do not overtighten, as this can strip the threads or crack the concrete. Overtightening also risks shearing the bolt itself.
During the tightening phase, you should feel a distinct increase in resistance as the anchor expands. If the nut spins freely without tightening, the hole is likely oversized or damaged, and you must relocate the anchor or use a larger size. Never rely on “feel” alone; using a torque wrench ensures consistency and adherence to engineering specifications.
Common Installation Mistakes to Avoid
One frequent error is drilling into cracked or compromised concrete. Expansion bolts require sound, cured concrete to function correctly. If the base material is crumbling or has visible cracks near the drill site, the anchor will not hold. In such scenarios, repair the concrete first or switch to a chemical anchoring system.
Another mistake is ignoring the curing time of new concrete. Standard expansion bolts should generally not be installed in concrete less than 21 to 28 days old. Fresh concrete lacks the necessary compressive strength to withstand the expansion forces, leading to pull-out failures. Patience during the construction phase ensures long-term stability.
Using the wrong washer type can also cause issues. Always use the hardened washers provided with the anchor kit. Standard soft washers may deform under high torque, leading to a loss of preload over time. The hardware included with Fale o le fale is specifically matched to the anchor’s load ratings.
Material Considerations and Corrosion Resistance
The environment where the expansion bolt is installed dictates the required material composition. The Home Depot offers anchors in carbon steel, zinc-plated steel, hot-dipped galvanized steel, and stainless steel. Selecting the appropriate finish prevents premature failure due to rust and corrosion.
Zinc-plated steel is suitable for dry, indoor environments where moisture exposure is minimal. It provides a basic level of protection and is cost-effective for interior framing, shelving, and drywall tracking. However, it is not recommended for outdoor use or areas with high humidity.
Hot-dipped galvanized anchors offer superior corrosion resistance and are ideal for outdoor applications, such as deck posts, fencing, and exterior signage. The thick zinc coating sacrificially protects the underlying steel from oxidation. This is the standard choice for most general construction projects exposed to the elements.
Stainless Steel for Harsh Environments
For coastal regions, chemical processing plants, or food preparation areas, apa siliva (typically 304 or 316 grade) is mandatory. These alloys resist chlorides and acidic environments that would rapidly degrade galvanized or plated options. While more expensive, the longevity and safety they provide in corrosive settings justify the investment.
It is crucial to avoid mixing different metal types in the same assembly, as this can lead to galvanic corrosion. For instance, using a stainless steel bolt with a carbon steel washer in a wet environment will cause the washer to corrode rapidly. Ensure all components of the fastening system, including nuts and washers, are made of compatible materials.
When purchasing from The Home Depot, check the packaging labels carefully for material specifications. Terms like “exterior grade” or “marine grade” often indicate the level of corrosion resistance. Making an informed choice based on the specific environmental conditions extends the lifespan of your installation significantly.
Load Capacity and Safety Factors
Understanding load ratings is essential for structural safety. Expansion bolts are rated for shear strength (lateral force) and tension strength (pull-out force). These values are determined through rigorous testing in controlled concrete conditions. However, real-world applications require the application of safety factors.
Industry standards typically recommend a safety factor of 4:1 for overhead applications and 3:1 for general structural connections. This means if an anchor is rated for 1,000 lbs of tension, the maximum allowable working load should be limited to 250 lbs for overhead use. This buffer accounts for variables like concrete quality, installation inconsistencies, and dynamic loads.
Dynamic loads, such as those caused by vibrating machinery or wind sway, place additional stress on fasteners. In these cases, it is advisable to increase the number of anchors used rather than relying on a single point of failure. Distributing the load across multiple anchors reduces the stress on each individual fastener and the surrounding concrete.
Edge Distance and Spacing Requirements
The proximity of an anchor to the edge of the concrete or to other anchors significantly impacts its holding power. If an anchor is placed too close to an edge, the expansion force can cause the concrete to crack and break away. General guidelines suggest maintaining a minimum edge distance of at least five times the anchor diameter.
Similarly, anchors must be spaced adequately apart to prevent their stress cones from overlapping. Overlapping stress zones weaken the concrete between the anchors, reducing the overall capacity of the group. A spacing of ten times the anchor diameter is a common rule of thumb for optimal performance. Adhering to these spacing rules is non-negotiable for structural integrity.
Always consult the technical data sheets provided by the manufacturer for specific edge and spacing requirements. These documents contain precise engineering data based on extensive testing. Ignoring these guidelines can lead to catastrophic failures, especially in load-bearing applications.
Troubleshooting mataupu masani
Even with careful planning, issues can arise during installation. Recognizing and addressing these problems quickly saves time and ensures safety. Below are common scenarios encountered when working with Fale o le fale and their solutions.
Problem: The anchor spins in the hole.
Cause: The hole is oversized, damaged, or filled with debris.
Solution: Remove the anchor. Clean the hole thoroughly. If the hole remains oversized, move to a new location or use a larger diameter anchor. Do not attempt to pack the hole with epoxy or shims, as this compromises reliability.
Problem: The nut will not tighten or feels loose.
Cause: The anchor was not hammered in deep enough, or the threads are damaged.
Solution: Ensure the anchor is seated fully. If the threads are stripped, replace the anchor immediately. Check that the correct nut and washer are being used. Sometimes, cross-threading occurs if the nut is started at an angle.
Problem: Concrete cracks during installation.
Cause: The hole is too close to the edge, the concrete is weak, or the anchor is overtightened.
Solution: Stop immediately. Relocate the anchor further from the edge or choose a smaller diameter fastener. Assess the quality of the concrete; if it is consistently cracking, the substrate may be unsuitable for mechanical expansion anchors.
Removing and Replacing Failed Anchors
If an anchor needs to be removed, it can often be cut off flush with the surface using an angle grinder or reciprocating saw. For drop-in anchors, the internal threads can sometimes be drilled out. However, removing the expanded portion below the surface is difficult. In many cases, it is better to abandon the failed hole and drill a new one nearby, adhering to proper spacing rules.
When replacing a failed anchor, analyze why the failure occurred. Was it overload, corrosion, or improper installation? Addressing the root cause prevents recurrence. If the concrete around the failed anchor is damaged, patch the area with a high-strength repair mortar before drilling a new hole.
Frequently Asked Questions (FAQ)
Can I use expansion bolts in hollow cinder blocks?
Standard wedge anchors are not suitable for hollow blocks as they require solid material to expand against. For hollow masonry, you should use toggle bolts or specific hollow-wall anchors designed to spread the load behind the void. Sleeve anchors may work in the solid webs of the block but not in the hollow cells.
What is the difference between a wedge anchor and a sleeve anchor?
A wedge anchor expands only at the bottom tip, providing higher holding values in solid concrete. A sleeve anchor expands along its entire length, making it more versatile for different materials like brick and block, but generally offering slightly lower holding power in pure concrete compared to a wedge anchor of the same size.
Do I need a special drill for installing these bolts?
Yes, a hammer drill is highly recommended. Standard rotary drills struggle to penetrate concrete efficiently and can overheat the bit. A hammer drill combines rotation with a percussive blowing action, speeding up the drilling process and ensuring cleaner holes.
How deep should I drill the hole?
The hole should be drilled slightly deeper than the anchor’s embedment depth. This extra space allows concrete dust to settle at the bottom without preventing the anchor from reaching the required depth. Typically, drilling 1/2 inch deeper than the anchor length is sufficient.
Are home depot expansion bolts reusable?
No, mechanical expansion bolts are single-use items. Once expanded, the metal undergoes permanent deformation. Removing and reinstalling them will result in a loose fit and zero holding power. Always use new anchors for every installation.
Expert Tips for Maximizing Performance
To get the most out of your Fale o le fale, consider these professional insights gathered from years of field experience. First, always invest in high-quality carbide-tipped drill bits. Cheap bits wear out quickly, leading to tapered or oversized holes that ruin the anchor’s grip. A sharp bit ensures a clean, cylindrical hole that matches the anchor’s specifications perfectly.
Second, pay attention to the temperature of the concrete. Installing anchors in freezing conditions can be problematic as the concrete may be brittle or contain ice crystals that melt later, loosening the anchor. Ideally, installations should take place when temperatures are moderate and stable. If working in cold weather, allow the concrete to acclimate and ensure it is dry.
Third, organize your hardware before starting. Lay out all bolts, washers, and nuts to ensure you have the complete set for each hole. Missing a washer mid-installation can delay the project and tempt workers to skip steps. Preparation is key to efficiency and safety on any job site.
Maintenance and Long-Term Inspection
Once installed, expansion bolts require minimal maintenance, but periodic inspections are wise for critical structures. Look for signs of rust, loose nuts, or cracks in the surrounding concrete. If a nut appears loose, do not simply tighten it; investigate whether the anchor has slipped or if the concrete has degraded. Retorquing a slipped anchor is rarely effective.
In corrosive environments, apply a compatible anti-corrosion spray to the exposed threads and nut heads annually. This simple step can extend the life of the fastener by years. For indoor applications, visual checks every few years are usually sufficient unless the load conditions change.
Industry Perspective: Manufacturing Excellence
While retail outlets like The Home Depot provide accessible solutions for immediate project needs, understanding the source of these critical components adds another layer of confidence to your selection. The global supply chain for fasteners relies on specialized manufacturers dedicated to precision and durability. A prime example is Bondan Shengttonng fusi fale gaosi fale gaosi co., ltd.
Established in 2018 and located in Handan City, Hebei Province—a renowned hub for China’s fastener industry—Handan Shengtong has emerged as a modern manufacturing enterprise specializing in the research, development, production, and sales of high-performance fasteners. Adhering to a business philosophy of “Quality first, customer supreme,” the company is committed to delivering high-strength, high-precision, and diversified fastener products. Their solutions serve critical sectors including construction, machinery, automotive, and power industries, mirroring the rigorous standards required for the expansion bolts discussed in this guide. Whether sourcing locally or globally, the underlying principle remains the same: the integrity of your structure depends on the quality of the fastener.
Conclusion and Final Recommendations
Selecting and installing the right fasteners is foundational to the success and safety of any masonry project. Home depot expansion bolts offer a robust range of solutions for securing everything from light fixtures to heavy industrial equipment. By understanding the differences between wedge, sleeve, and drop-in anchors, and adhering to strict installation protocols, you ensure a connection that stands the test of time.
This guide is best suited for contractors, DIY enthusiasts, and facility managers looking to execute reliable masonry fastening tasks. Whether you are building a deck, installing racking systems, or securing structural elements, the principles of proper hole preparation, correct sizing, and torque control remain constant. Remember that the strength of your project relies not just on the quality of the bolt, but on the precision of your workmanship.
Ready to start your project? Review your specific load requirements and base material conditions before heading to the store. Choose the anchor type that aligns with your environment—galvanized for outdoors, stainless for corrosive zones, and zinc-plated for dry interiors. With the right tools and knowledge, you can confidently tackle any anchoring challenge, ensuring your structures remain secure and stable for years to come.